* Advanced IBM POWER6™ processor cores for enhanced performance and reliability
* Building block architecture delivers flexible scalability and modular growth
* Advanced virtualization features facilitate highly efficient systems utilization
* Enhanced RAS features enable improved application availability
The IBM POWER6 processor-based System p™ 570 mid-range server delivers outstanding price/performance, mainframe-inspired reliability and availability features, flexible capacity upgrades and innovative virtualization technologies. This powerful 19-inch rack-mount system, which can handle up to 16 POWER6 cores, can be used for database and application serving, as well as server consolidation. The modular p570 is designed to continue the tradition of its predecessor, the IBM POWER5+™ processor-based System p5™ 570 server, for resource optimization, secure and dependable performance and the flexibility to change with business needs. Clients have the ability to upgrade their current p5-570 servers and know that their investment in IBM Power Architecture™ technology has again been rewarded.
The p570 is the first server designed with POWER6 processors, resulting in performance and price/performance advantages while ushering in a new era in the virtualization and availability of UNIX® and Linux® data centers. POWER6 processors can run 64-bit applications, while concurrently supporting 32-bit applications to enhance flexibility. They feature simultaneous multithreading,1 allowing two application “threads” to be run at the same time, which can significantly reduce the time to complete tasks.
The p570 system is more than an evolution of technology wrapped into a familiar package; it is the result of “thinking outside the box.” IBM’s modular symmetric multiprocessor (SMP) architecture means that the system is constructed using 4-core building blocks. This design allows clients to start with what they need and grow by adding additional building blocks, all without disruption to the base system.2 Optional Capacity on Demand features allow the activation of dormant processor power for times as short as one minute. Clients may start small and grow with systems designed for continuous application availability.
Specifically, the System p 570 server provides:
Common features Hardware summary
* 19-inch rack-mount packaging
* 2- to 16-core SMP design with building block architecture
* 64-bit 3.5, 4.2 or 4.7 GHz POWER6 processor cores
* Mainframe-inspired RAS features
* Dynamic LPAR support
* Advanced POWER Virtualization1 (option)
o IBM Micro-Partitioning™ (up to 160 micro-partitions)
o Shared processor pool
o Virtual I/O Server
o Partition Mobility2
* Up to 32 optional I/O drawers
* IBM HACMP™ software support for near continuous operation*
* Supported by AIX 5L (V5.2 or later) and Linux® distributions from Red Hat (RHEL 4 Update 5 or later) and SUSE Linux (SLES 10 SP1 or later) operating systems
* 4U 19-inch rack-mount packaging
* One to four building blocks
* Two, four, eight, 12 or 16 3.5 GHz, 4.2 GHz or 4.7 GHz 64-bit POWER6 processor cores
* L2 cache: 8 MB to 64 MB (2- to 16-core)
* L3 cache: 32 MB to 256 MB (2- to 16-core)
* 2 GB to 192 GB of 667 MHz buffered DDR2 or 16 GB to 384 GB of 533 MHz buffered DDR2 or 32 GB to 768 GB of 400 MHz buffered DDR2 memory3
* Four hot-plug, blind-swap PCI Express 8x and two hot-plug, blind-swap PCI-X DDR adapter slots per building block
* Six hot-swappable SAS disk bays per building block provide up to 7.2 TB of internal disk storage
* Optional I/O drawers may add up to an additional 188 PCI-X slots and up to 240 disk bays (72 TB additional)4
* One SAS disk controller per building block (internal)
* One integrated dual-port Gigabit Ethernet per building block standard; One quad-port Gigabit Ethernet per building block available as optional upgrade; One dual-port 10 Gigabit Ethernet per building block available as optional upgrade
* Two GX I/O expansion adapter slots
* One dual-port USB per building block
* Two HMC ports (maximum of two), two SPCN ports per building block
* One optional hot-plug media bay per building block
* Redundant service processor for multiple building block systems2
Thursday, October 14, 2010
AIX,HP,SOLARIS,LINUX most used commands on 1 page
DIRECTORY MAPPINGS:

USER CREATION:
GENERAL COMMANDS:
PRINTERS:
TCP/IP:

SYSTEM FILES:
DISKS/LVM COMMANDS:

MISC:

SOFTWARE:

DEVICES:


USER CREATION:

GENERAL COMMANDS:

PRINTERS:

TCP/IP:

SYSTEM FILES:

DISKS/LVM COMMANDS:

MISC:

SOFTWARE:

DEVICES:

Rootvg disk replacement procedure
root$ lsvg -p rootvg
rootvg:
PV_NAME PV STATE TOTAL PPs FREE PPs FREE DISTRIBUTION
hdisk0 active 546 78 33..11..00..00..34
hdisk1 missing 546 119 09..16..00..00..94
root$ lsvg -l rootvg
rootvg:
LV NAME TYPE LPs PPs PVs LV STATE MOUNT POINT
hd5 boot 3 6 2 closed/stale N/A
hd6 paging 64 128 2 open/stale N/A
hd8 jfs2log 1 2 2 open/stale N/A
hd4 jfs2 2 4 2 open/stale /
hd2 jfs2 32 64 2 open/stale /usr
hd9var jfs2 5 10 2 open/stale /var
hd3 jfs2 16 32 2 open/stale /tmp
hd1 jfs2 3 6 2 open/stale /home
hd10opt jfs2 5 10 2 open/stale /opt
appllv jfs2 14 28 2 open/stale /appl
nsrlv jfs2 1 2 2 open/stale /nsr
hd7x sysdump 46 46 1 open/syncd N/A
hd7 sysdump 46 46 1 open/syncd N/A
lv00 jfs 41 41 1 closed/syncd N/A
loglv00 jfslog 1 2 2 open/stale N/A
root$ lslv -l hd7x
hd7x:N/A
PV COPIES IN BAND DISTRIBUTION
hdisk1 046:000:000 0% 000:000:000:031:015
A) Description:
From above outputs its clear that hdisk1 is in missing state. It has either failed or had some stale partitions. Also we see that there is a Secondary Dump device which is created on hdisk1.
B) Pre-replacement steps:
** varyonvg rootvg --> This will solve the problems of stale partitions if any.
If above step shows right status hdisk1 dont need replacement.
Else log a call with IBM, send snap -gc and confirm with them hdisk1 has failed and plan replacement accordingly.
C) Steps while replacing the disk in rootvg:
1) touch /dev/sysdumpnull --> Make a null Sysdump device.
2) sysdumpdev -Ps /dev/sysdumpnull --> Change the secondary dump device null.
3) rmlv hd7x --> Remove Secondary Dump device from hdisk1.
4) unmirrorvg rootvg hdisk1 --> Break the mirror.
5) reducevg rootvg hdisk1 --> Remove hdisk1 from rootvg
6) After step 5 hdisk1 can be removed. Let IBM do the replacement of the disk. Once its replaced configure the disk again on the server
cfgmgr -v
7) lspv | grep -i hdisk | grep -i none | more --> Check name of the new hdisk.
8) extendvg rootvg newdiskname --> Add the new disk to rootvg.
9) mirrorvg rootvg newdiskname --> Mirror the new disk.
10) varryonvg rootvg --> Synchronizing the Volume Group.
11) bootlist -m normal -o --> Check the current bootlist.
12) bosboot -ad /dev/hdisk0 --> Update the boot image again.
13) bosboot -ad /dev/newdiskname --> Update the boot image for new disk.
14) bootlist -m normal hdisk0 hdisk1 --> Set the bootlist again.
15) create a lv hd7x (secondary sysdump) on the new disk according to the previous size of the dump device.
16) sysdumpdev -Ps /dev/hd7x --> Assign hd7x as secondary dump device.
D) Sometimes while replacing the disks IBM has wrong disk location. If you want to give an indication to the IBM CE with the right disk to be replaced you can do below:
diag --> Task Selection (Diagnostics, Advanced Diagnostics, Service Aids, etc.) --> Hot Plug Task --> SCSI and SCSI RAID Hot Plug Manager -->
LIST SCSI HOT SWAP ENCLOSURE DEVICES 802482
The following is a list of SCSI Hot Swap Enclosure Devices. Status information
about a slot can be viewed.
Make selection, use Enter to continue.
U7879.001.DQD16J9-
ses0 P1-T14-L15-L0
slot 1 [empty slot]
slot 2 [empty slot]
slot 3 [empty slot]
U7879.001.DQD16J9-
ses1 P1-T12-L15-L0
slot 1 P1-T12-L5-L0 hdisk1
slot 2 P1-T12-L4-L0 hdisk0
slot 3 [empty slot]
Here you can select the right location and give an Indicator to IBM.
rootvg:
PV_NAME PV STATE TOTAL PPs FREE PPs FREE DISTRIBUTION
hdisk0 active 546 78 33..11..00..00..34
hdisk1 missing 546 119 09..16..00..00..94
root$ lsvg -l rootvg
rootvg:
LV NAME TYPE LPs PPs PVs LV STATE MOUNT POINT
hd5 boot 3 6 2 closed/stale N/A
hd6 paging 64 128 2 open/stale N/A
hd8 jfs2log 1 2 2 open/stale N/A
hd4 jfs2 2 4 2 open/stale /
hd2 jfs2 32 64 2 open/stale /usr
hd9var jfs2 5 10 2 open/stale /var
hd3 jfs2 16 32 2 open/stale /tmp
hd1 jfs2 3 6 2 open/stale /home
hd10opt jfs2 5 10 2 open/stale /opt
appllv jfs2 14 28 2 open/stale /appl
nsrlv jfs2 1 2 2 open/stale /nsr
hd7x sysdump 46 46 1 open/syncd N/A
hd7 sysdump 46 46 1 open/syncd N/A
lv00 jfs 41 41 1 closed/syncd N/A
loglv00 jfslog 1 2 2 open/stale N/A
root$ lslv -l hd7x
hd7x:N/A
PV COPIES IN BAND DISTRIBUTION
hdisk1 046:000:000 0% 000:000:000:031:015
A) Description:
From above outputs its clear that hdisk1 is in missing state. It has either failed or had some stale partitions. Also we see that there is a Secondary Dump device which is created on hdisk1.
B) Pre-replacement steps:
** varyonvg rootvg --> This will solve the problems of stale partitions if any.
If above step shows right status hdisk1 dont need replacement.
Else log a call with IBM, send snap -gc and confirm with them hdisk1 has failed and plan replacement accordingly.
C) Steps while replacing the disk in rootvg:
1) touch /dev/sysdumpnull --> Make a null Sysdump device.
2) sysdumpdev -Ps /dev/sysdumpnull --> Change the secondary dump device null.
3) rmlv hd7x --> Remove Secondary Dump device from hdisk1.
4) unmirrorvg rootvg hdisk1 --> Break the mirror.
5) reducevg rootvg hdisk1 --> Remove hdisk1 from rootvg
6) After step 5 hdisk1 can be removed. Let IBM do the replacement of the disk. Once its replaced configure the disk again on the server
cfgmgr -v
7) lspv | grep -i hdisk | grep -i none | more --> Check name of the new hdisk.
8) extendvg rootvg newdiskname --> Add the new disk to rootvg.
9) mirrorvg rootvg newdiskname --> Mirror the new disk.
10) varryonvg rootvg --> Synchronizing the Volume Group.
11) bootlist -m normal -o --> Check the current bootlist.
12) bosboot -ad /dev/hdisk0 --> Update the boot image again.
13) bosboot -ad /dev/newdiskname --> Update the boot image for new disk.
14) bootlist -m normal hdisk0 hdisk1 --> Set the bootlist again.
15) create a lv hd7x (secondary sysdump) on the new disk according to the previous size of the dump device.
16) sysdumpdev -Ps /dev/hd7x --> Assign hd7x as secondary dump device.
D) Sometimes while replacing the disks IBM has wrong disk location. If you want to give an indication to the IBM CE with the right disk to be replaced you can do below:
diag --> Task Selection (Diagnostics, Advanced Diagnostics, Service Aids, etc.) --> Hot Plug Task --> SCSI and SCSI RAID Hot Plug Manager -->
LIST SCSI HOT SWAP ENCLOSURE DEVICES 802482
The following is a list of SCSI Hot Swap Enclosure Devices. Status information
about a slot can be viewed.
Make selection, use Enter to continue.
U7879.001.DQD16J9-
ses0 P1-T14-L15-L0
slot 1 [empty slot]
slot 2 [empty slot]
slot 3 [empty slot]
U7879.001.DQD16J9-
ses1 P1-T12-L15-L0
slot 1 P1-T12-L5-L0 hdisk1
slot 2 P1-T12-L4-L0 hdisk0
slot 3 [empty slot]
Here you can select the right location and give an Indicator to IBM.
AIX useful commands
Filesystems:
Default rootvg Filesystems
hd1 - /home
hd2 - /usr
hd3 - /tmp
hd4 - /
hd5 - Boot logical volume
hd6 - paging space
hd8 - log device
hd9var - /var
hd10opt - /opt
hd11admin - /admin
Remove mount point entry and the LV for /mymount
rmfs /mymount (Add -r to remove mount point)
Grow the /var Filesystem by 1 Gig
chfs -a size=+1G /var
Grow the /var Filesystem to 1 Gig
chfs -a size=1G /var
Find the File usage on a Filesystem
du -smx /
List Filesystems in a grep-able format
lsfs
Get extended information about the /home Filesystem
lsfs -q /home
Create a log device on datavg VG
mklv -t jfs2log -y datalog1 datavg 1
Format the log device just created
logform /dev/datalog1
Kernel Tuning:
no is used in the following examples. vmo, no, nfso, ioo, raso, and
schedo all use similar syntax.
Reset all networking tunables to the default values
no -D (Changed values will be listed)
List all networking tunables
no -a
Set a tunable temporarily (until reboot)
no -o use isno=1
Set a tunable at next reboot
no -r -o use isno=1
Set current value of tunable as well as reboot
no -p -o use isno=1
List all settings, defaults, min, max, and next boot values
no -L
List all sys0 tunables
lsattr -El sys0
Get information on the minperm% vmo tunable
vmo -h minperm%
Change the maximum number of user processes to 2048
chdev -l sys0 -a maxuproc=2048
Check to see if SMT is enabled
smtctl
ODM:
Query CuDv for a speci c item
odmget -q name=hdisk0 CuDv
Query CuDv using the \like" syntax
odmget -q "name like hdisk?" CuDv
Query CuDv using a complex query
odmget -q "name like hdisk? and parent like vscsi?" CuDv
Devices:
List all devices on a system
lsdev
Device states are: Unde ned; Supported Device, De ned; Not usable
(once seen), Available; Usable
List all disk devices on a system (Some other devices are: adapter,
driver, logical volume, processor)
lsdev -Cc disk
List all customized (existing) device classes (-P for complete list)
lsdev -C -r class
Remove hdisk5
rmdev -dl hdisk5
Get device address of hdisk1
getconf DISK DEVNAME hdisk1 or bootinfo -o hdisk1
Get the size (in MB) of hdisk1
getconf DISK SIZE hdisk1 or bootinfo -s hdisk1
Find the slot of a PCI Ethernet adapter
lsslot -c pci -l ent0
Find the (virtual) location of an Ethernet adapter
lscfg -l ent1
Find the location codes of all devices in the system
lscfg
List all MPIO paths for hdisk0
lspath -l hdisk0
Find the WWN of the fcs0 HBA adapter
lscfg -vl fcs0 | grep Network
Temporarily change console output to /console.out
swcons /console.out (Use swcons to change back.)
Tasks:
Change port type of (a 2Gb) HBA (4Gb may use di erent setting)
rmdev -d -l fcnet0
rmdev -d -l fscsi0
chdev -l fcs0 -a link type=pt2pt
cfgmgr
Mirroring rootvg to hdisk1
extendvg rootvg hdisk1
mirrorvg rootvg
bosboot -ad hdisk0
bosboot -ad hdisk1
bootlist -m normal hdisk0 hdisk1
Mount a CD ROM to /mnt
mount -rv cdrfs /dev/cd0 /mnt
Create a VG, LV, and FS, mirror, and create mirrored LV
mkvg -s 256 -y datavg hdisk1 (PP size is 1/4 Gig)
mklv -t jfs2log -y dataloglv datavg 1
logform /dev/dataloglv
mklv -t jfs2 -y data01lv datavg 8 (2 Gig LV)
crfs -v jfs2 -d data01lv -m /data01 -A yes
extendvg datavg hdisk2
mklvcopy dataloglv 2 (Note use of mirrorvg in next example)
mklvcopy data01lv 2
syncvg -v datavg
lsvg -l datavg will now list 2 PPs for every LP
mklv -c 2 -t jfs2 -y data02lv datavg 8 (2 Gig LV)
crfs -v jfs2 -d data02lv -m /data02 -A yes
mount -a
Move a VG from hdisk1 to hdisk2
extendvg datavg hdisk2
mirrorvg datavg hdisk2
unmirrorvg datavg hdisk1
reducevg datavg hdisk1
Find the free space on PV hdisk1
lspv hdisk1 (Look for \FREE PPs")
Users and Groups:
List all settings for root user in grepable format
lsuser -f root
List just the user names
lsuser -a id ALL | sed 's/ id.*$//'
Find the fsize value for user wfavorit
lsuser -a fsize wfavorit
Change the fsize value for user wfavorit
chuser fsize=-1 wfavorit
Networking:
The examples here assume that the default TCP/IP configuration (rc.net) method is used. If the alternate method of using rc.bsdnet
is used then some of these examples may not apply.
Determine if rc.bsdnet is used over rc.net
lsattr -El inet0 -a bootup option
TCP/IP related daemon startup script
/etc/rc.tcpip
To view the route table
netstat -r
To view the route table from the ODM DB
lsattr -EHl inet0 -a route
Temporarily add a default route
route add default 192.168.1.1
Temporarily add an address to an interface
ifconfig en0 192.168.1.2 netmask 255.255.255.0
Temporarily add an alias to an interface
ifconfig en0 192.168.1.3 netmask 255.255.255.0 alias
To permanently add an IP address to the en1 interface
chdev -l en1 -a netaddr=192.168.1.1 -a netmask=0xffffff00
Permanently add an alias to an interface
chdev -l en0 -a alias4=192.168.1.3,255.255.255.0
Remove a permanently added alias from an interface
chdev -l en0 -a delalias4=192.168.1.3,255.255.255.0
List ODM (next boot) IP con guration for interface
lsattr -El en0
Permanently set the hostname
chdev -l inet0 -a hostname=www.tablesace.net
Turn on routing by putting this in rc.net
no -o ipforwarding=1
List networking devices
lsdev -Cc tcpip
List Network Interfaces
lsdev -Cc if
List attributes of inet0
lsattr -Ehl inet0
List (physical layer) attributes of ent0
lsattr -El ent0
List (networking layer) attributes of en0
lsattr -El en0
Speed is found through the entX device
lsattr -El ent0 -a media speed
Set the ent0 link to Gig full duplex
(Auto Negotiation is another option)
chdev -l ent0 -a media speed=1000 Full Duplex -P
Turn o Interface Speci c Network Options
no -p -o use isno=0
Get (long) statistics for the ent0 device (no -d is shorter)
entstat -d ent0
List all open, and in use TCP and UDP ports
netstat -anf inet
List all LISTENing TCP ports
netstat -na | grep LISTEN
Remove all TCP/IP con guration from a host
rmtcpip
IP packets can be captured using iptrace / ipreport or tcpdump
Error Logging:
Error logging is provided through: alog, errlog and syslog.
Display the contents of the boot log
alog -o -t boot
Display the contents of the console log
alog -o -t console
List all log types that alog knows
alog -L
Send a message to errlog
errlogger "Your message here"
Display the contents of the system error log
errpt (Add -a or -A for varying levels of verbosity)
Errors listed from errpt can be limited by the -d S or -d H op-
tions. S is software and H is hardware. Error types are (P)ermanent,
(T)emporary, (I)nformational, or (U)nknown. Error classes are
(H)ardware, (S)oftware, (O)perator, or (U)ndetermined.
Clear all errors up until x days ago.
errclear x
List info on error ID FE2DEE00 (IDENTIFIER column in errpt output)
errpt -aDj FE2DEE00
Put a \tail" on the error log
errpt -c
List all errors that happened today
errpt -s `date +%m%d0000%y`
To list all errors on hdisk0
errpt -N hdisk0
To list details about the error log
/usr/lib/errdemon -l
To change the size of the error log to 2 MB
/usr/lib/errdemon -s 2097152
syslog.conf line to send all messages to log le
*.debug /var/log/messages
syslog.conf line to send all messages to error log
*.debug errlog
Error log messages can be redirected to the syslog using the errnotify
ODM class.
smitty FastPaths:
Find a smitty FastPath by walking through the smitty screens to get
to the screen you wish. Then Hit F8. The dialog will tell you what
FastPath will get you to that screen. (F3 closes the dialog.)
lvm - LVM Menu
mkvg - Screen to create a VG
con gtcp - TCP/IP Con guration
eadap - Ethernet adapter section
fcsdd - Fibre Channel adapter section
chgsys - Change / Show characteristics of OS
users - Manage users (including ulimits)
devdrpci - PCI Hot Plug manger
etherchannel - EtherChannel / Port Aggregation
System Resource Controller:
Start the xntpd service
startsrc -s xntpd
Stop the NFS related services
stopsrc -g nfs
Refresh the named service
refresh -s named
List all registered services on the system
lssrc -a
Show status of ctrmc subsystem
lssrc -l -s ctrmc
Working with Packages:
List all Files in bos.games Fileset.
lslpp -f bos.games
Find out what Fileset \fortune" belongs to.
lslpp -w /usr/games/fortune
List packages that are above the current OS level
oslevel -g
Find packages below a specified ML
oslevel -rl 5300-05
List installed MLs
instfix -i | grep AIX ML
List all Filesets
lslpp -L
List all filesets in a grepable or awkable format
lslpp -Lc
Find the package that contains the filemon utility
which fileset filemon
Install the database (from CD) for which fileset
installp -ac -d /dev/cd0 bos.content list
Create a mksysb backup of the rootvg volume group
mksysb -i /mnt/server1.mksysb.`date +%m%d%y`
Cleanup after a failed install
installp -C
LVM:
Put a PVID on a disk
chdev -l hdisk1 -a pv=yes
Remove a PVID from a disk
chdev -l hdisk1 -a pv=clear
List all PVs in a system (along) with VG membership
lspv
Create a VG called datavg using hdisk1 using 64 Meg PPs
mkvg -y datavg -s 64 hdisk1
Create a LV on (previous) datavg that is 1 Gig in size
mklv -t jfs2 -y datalv datavg 16
List all LVs on the datavg VG
lsvg -l datavg
List all PVs in the datavg VG
lsvg -p datavg
Take the datavg VG o ine
varyoffvg datavg
Remove the datavg VG from the ODM
exportvg datavg
Import the VG on hdisk5 as datavg
importvg -y datavg hdisk5
Vary-on the new datavg VG (can use importvg -n)
varyonvg datavg
List all VGs (known to the ODM)
lsvg
List all VGs that are on line
lsvg -o
Check to see if underlying disk in datavg has grown in size
chvg -g datavg
Move a LV from one PV to another
migratepv -l datalv01 hdisk4 hdisk5
Delete a VG by removing all PVs with the reducevg command.
reducevg hdisk3 (-d removes any LVs that may be on that PV)
Memory / Swapfile:
List size, summary, and paging activity by paging space
lsps -a
List summary of all paging space
lsps -s
List the total amount of physical RAM in system
lsattr -El sys0 -a realmem
Extend the existing paging space by 8 PPs
chps -s 8 hd6
Performance Monitoring:
Make topas look like top
topas -P
View statistics from other partitions
topas -C
View statistics for disk I/O
topas -D
Show statistics related to micro-partitions in Power5 environment
topas -L
All of the above commands are availible from within topas
Use mpstat -d to determine processor afinity on a system. Look for
s0 entries for the best afinity and lesser afinity in the higher fields.
Get verbose disk stats for hdisk0 every 2 sec
iostat -D hdisk0 2
Get extended vmstat info every 2 seconds
while [ 1 ]; do vmstat -vs; sleep 2; clear; done
Get running CPU stats for system
mpstat 1
Get time based summary totals of network usage by process
netpmon to start statistics gathering, trcstop to finish and summarize.
Getting info about the system:
Find the version of AIX that is running
oslevel
Find the ML/TL or service pack version
oslevel -r {or{ oslevel -s
List all attributes of system
getconf -a
Find the type of kernel loaded (use -a to get all options)
getconf KERNEL BITMODE
bootinfo and getconf can return much of the same information, getconf
returns more and has the grepable -a option.
Find the level of rmware on a system
invscout
List all attributes for the kernel \device"
lsattr -El sys0
Print a \dump" of system information
prtconf
Display Error Codes:
214,2C5,2C6,2C7,302,303,305 - Memory errors
152,287,289 - Power supply failure
521 - init process has failed
551,552,554,555,556,557 - Corrupt LVM, rootvg, or JFS log
553 - inittab or /etc/environment corrupt
552,554,556 - Corrupt filesystem superblock
521 through 539 - cfgmgr (and ODM) related errors
532,558 - Out of memory during boot process
518 - Failed to mount /var or /usr
615 - Failed to con g paging device
More information is availible in the \Diagnostic Information for Multiple Bus Systems" manual
Security
groups Lists out the groups that the user is a member of
NFS:
exportfs Lists all exported filesystems
Default rootvg Filesystems
hd1 - /home
hd2 - /usr
hd3 - /tmp
hd4 - /
hd5 - Boot logical volume
hd6 - paging space
hd8 - log device
hd9var - /var
hd10opt - /opt
hd11admin - /admin
Remove mount point entry and the LV for /mymount
rmfs /mymount (Add -r to remove mount point)
Grow the /var Filesystem by 1 Gig
chfs -a size=+1G /var
Grow the /var Filesystem to 1 Gig
chfs -a size=1G /var
Find the File usage on a Filesystem
du -smx /
List Filesystems in a grep-able format
lsfs
Get extended information about the /home Filesystem
lsfs -q /home
Create a log device on datavg VG
mklv -t jfs2log -y datalog1 datavg 1
Format the log device just created
logform /dev/datalog1
Kernel Tuning:
no is used in the following examples. vmo, no, nfso, ioo, raso, and
schedo all use similar syntax.
Reset all networking tunables to the default values
no -D (Changed values will be listed)
List all networking tunables
no -a
Set a tunable temporarily (until reboot)
no -o use isno=1
Set a tunable at next reboot
no -r -o use isno=1
Set current value of tunable as well as reboot
no -p -o use isno=1
List all settings, defaults, min, max, and next boot values
no -L
List all sys0 tunables
lsattr -El sys0
Get information on the minperm% vmo tunable
vmo -h minperm%
Change the maximum number of user processes to 2048
chdev -l sys0 -a maxuproc=2048
Check to see if SMT is enabled
smtctl
ODM:
Query CuDv for a speci c item
odmget -q name=hdisk0 CuDv
Query CuDv using the \like" syntax
odmget -q "name like hdisk?" CuDv
Query CuDv using a complex query
odmget -q "name like hdisk? and parent like vscsi?" CuDv
Devices:
List all devices on a system
lsdev
Device states are: Unde ned; Supported Device, De ned; Not usable
(once seen), Available; Usable
List all disk devices on a system (Some other devices are: adapter,
driver, logical volume, processor)
lsdev -Cc disk
List all customized (existing) device classes (-P for complete list)
lsdev -C -r class
Remove hdisk5
rmdev -dl hdisk5
Get device address of hdisk1
getconf DISK DEVNAME hdisk1 or bootinfo -o hdisk1
Get the size (in MB) of hdisk1
getconf DISK SIZE hdisk1 or bootinfo -s hdisk1
Find the slot of a PCI Ethernet adapter
lsslot -c pci -l ent0
Find the (virtual) location of an Ethernet adapter
lscfg -l ent1
Find the location codes of all devices in the system
lscfg
List all MPIO paths for hdisk0
lspath -l hdisk0
Find the WWN of the fcs0 HBA adapter
lscfg -vl fcs0 | grep Network
Temporarily change console output to /console.out
swcons /console.out (Use swcons to change back.)
Tasks:
Change port type of (a 2Gb) HBA (4Gb may use di erent setting)
rmdev -d -l fcnet0
rmdev -d -l fscsi0
chdev -l fcs0 -a link type=pt2pt
cfgmgr
Mirroring rootvg to hdisk1
extendvg rootvg hdisk1
mirrorvg rootvg
bosboot -ad hdisk0
bosboot -ad hdisk1
bootlist -m normal hdisk0 hdisk1
Mount a CD ROM to /mnt
mount -rv cdrfs /dev/cd0 /mnt
Create a VG, LV, and FS, mirror, and create mirrored LV
mkvg -s 256 -y datavg hdisk1 (PP size is 1/4 Gig)
mklv -t jfs2log -y dataloglv datavg 1
logform /dev/dataloglv
mklv -t jfs2 -y data01lv datavg 8 (2 Gig LV)
crfs -v jfs2 -d data01lv -m /data01 -A yes
extendvg datavg hdisk2
mklvcopy dataloglv 2 (Note use of mirrorvg in next example)
mklvcopy data01lv 2
syncvg -v datavg
lsvg -l datavg will now list 2 PPs for every LP
mklv -c 2 -t jfs2 -y data02lv datavg 8 (2 Gig LV)
crfs -v jfs2 -d data02lv -m /data02 -A yes
mount -a
Move a VG from hdisk1 to hdisk2
extendvg datavg hdisk2
mirrorvg datavg hdisk2
unmirrorvg datavg hdisk1
reducevg datavg hdisk1
Find the free space on PV hdisk1
lspv hdisk1 (Look for \FREE PPs")
Users and Groups:
List all settings for root user in grepable format
lsuser -f root
List just the user names
lsuser -a id ALL | sed 's/ id.*$//'
Find the fsize value for user wfavorit
lsuser -a fsize wfavorit
Change the fsize value for user wfavorit
chuser fsize=-1 wfavorit
Networking:
The examples here assume that the default TCP/IP configuration (rc.net) method is used. If the alternate method of using rc.bsdnet
is used then some of these examples may not apply.
Determine if rc.bsdnet is used over rc.net
lsattr -El inet0 -a bootup option
TCP/IP related daemon startup script
/etc/rc.tcpip
To view the route table
netstat -r
To view the route table from the ODM DB
lsattr -EHl inet0 -a route
Temporarily add a default route
route add default 192.168.1.1
Temporarily add an address to an interface
ifconfig en0 192.168.1.2 netmask 255.255.255.0
Temporarily add an alias to an interface
ifconfig en0 192.168.1.3 netmask 255.255.255.0 alias
To permanently add an IP address to the en1 interface
chdev -l en1 -a netaddr=192.168.1.1 -a netmask=0xffffff00
Permanently add an alias to an interface
chdev -l en0 -a alias4=192.168.1.3,255.255.255.0
Remove a permanently added alias from an interface
chdev -l en0 -a delalias4=192.168.1.3,255.255.255.0
List ODM (next boot) IP con guration for interface
lsattr -El en0
Permanently set the hostname
chdev -l inet0 -a hostname=www.tablesace.net
Turn on routing by putting this in rc.net
no -o ipforwarding=1
List networking devices
lsdev -Cc tcpip
List Network Interfaces
lsdev -Cc if
List attributes of inet0
lsattr -Ehl inet0
List (physical layer) attributes of ent0
lsattr -El ent0
List (networking layer) attributes of en0
lsattr -El en0
Speed is found through the entX device
lsattr -El ent0 -a media speed
Set the ent0 link to Gig full duplex
(Auto Negotiation is another option)
chdev -l ent0 -a media speed=1000 Full Duplex -P
Turn o Interface Speci c Network Options
no -p -o use isno=0
Get (long) statistics for the ent0 device (no -d is shorter)
entstat -d ent0
List all open, and in use TCP and UDP ports
netstat -anf inet
List all LISTENing TCP ports
netstat -na | grep LISTEN
Remove all TCP/IP con guration from a host
rmtcpip
IP packets can be captured using iptrace / ipreport or tcpdump
Error Logging:
Error logging is provided through: alog, errlog and syslog.
Display the contents of the boot log
alog -o -t boot
Display the contents of the console log
alog -o -t console
List all log types that alog knows
alog -L
Send a message to errlog
errlogger "Your message here"
Display the contents of the system error log
errpt (Add -a or -A for varying levels of verbosity)
Errors listed from errpt can be limited by the -d S or -d H op-
tions. S is software and H is hardware. Error types are (P)ermanent,
(T)emporary, (I)nformational, or (U)nknown. Error classes are
(H)ardware, (S)oftware, (O)perator, or (U)ndetermined.
Clear all errors up until x days ago.
errclear x
List info on error ID FE2DEE00 (IDENTIFIER column in errpt output)
errpt -aDj FE2DEE00
Put a \tail" on the error log
errpt -c
List all errors that happened today
errpt -s `date +%m%d0000%y`
To list all errors on hdisk0
errpt -N hdisk0
To list details about the error log
/usr/lib/errdemon -l
To change the size of the error log to 2 MB
/usr/lib/errdemon -s 2097152
syslog.conf line to send all messages to log le
*.debug /var/log/messages
syslog.conf line to send all messages to error log
*.debug errlog
Error log messages can be redirected to the syslog using the errnotify
ODM class.
smitty FastPaths:
Find a smitty FastPath by walking through the smitty screens to get
to the screen you wish. Then Hit F8. The dialog will tell you what
FastPath will get you to that screen. (F3 closes the dialog.)
lvm - LVM Menu
mkvg - Screen to create a VG
con gtcp - TCP/IP Con guration
eadap - Ethernet adapter section
fcsdd - Fibre Channel adapter section
chgsys - Change / Show characteristics of OS
users - Manage users (including ulimits)
devdrpci - PCI Hot Plug manger
etherchannel - EtherChannel / Port Aggregation
System Resource Controller:
Start the xntpd service
startsrc -s xntpd
Stop the NFS related services
stopsrc -g nfs
Refresh the named service
refresh -s named
List all registered services on the system
lssrc -a
Show status of ctrmc subsystem
lssrc -l -s ctrmc
Working with Packages:
List all Files in bos.games Fileset.
lslpp -f bos.games
Find out what Fileset \fortune" belongs to.
lslpp -w /usr/games/fortune
List packages that are above the current OS level
oslevel -g
Find packages below a specified ML
oslevel -rl 5300-05
List installed MLs
instfix -i | grep AIX ML
List all Filesets
lslpp -L
List all filesets in a grepable or awkable format
lslpp -Lc
Find the package that contains the filemon utility
which fileset filemon
Install the database (from CD) for which fileset
installp -ac -d /dev/cd0 bos.content list
Create a mksysb backup of the rootvg volume group
mksysb -i /mnt/server1.mksysb.`date +%m%d%y`
Cleanup after a failed install
installp -C
LVM:
Put a PVID on a disk
chdev -l hdisk1 -a pv=yes
Remove a PVID from a disk
chdev -l hdisk1 -a pv=clear
List all PVs in a system (along) with VG membership
lspv
Create a VG called datavg using hdisk1 using 64 Meg PPs
mkvg -y datavg -s 64 hdisk1
Create a LV on (previous) datavg that is 1 Gig in size
mklv -t jfs2 -y datalv datavg 16
List all LVs on the datavg VG
lsvg -l datavg
List all PVs in the datavg VG
lsvg -p datavg
Take the datavg VG o ine
varyoffvg datavg
Remove the datavg VG from the ODM
exportvg datavg
Import the VG on hdisk5 as datavg
importvg -y datavg hdisk5
Vary-on the new datavg VG (can use importvg -n)
varyonvg datavg
List all VGs (known to the ODM)
lsvg
List all VGs that are on line
lsvg -o
Check to see if underlying disk in datavg has grown in size
chvg -g datavg
Move a LV from one PV to another
migratepv -l datalv01 hdisk4 hdisk5
Delete a VG by removing all PVs with the reducevg command.
reducevg hdisk3 (-d removes any LVs that may be on that PV)
Memory / Swapfile:
List size, summary, and paging activity by paging space
lsps -a
List summary of all paging space
lsps -s
List the total amount of physical RAM in system
lsattr -El sys0 -a realmem
Extend the existing paging space by 8 PPs
chps -s 8 hd6
Performance Monitoring:
Make topas look like top
topas -P
View statistics from other partitions
topas -C
View statistics for disk I/O
topas -D
Show statistics related to micro-partitions in Power5 environment
topas -L
All of the above commands are availible from within topas
Use mpstat -d to determine processor afinity on a system. Look for
s0 entries for the best afinity and lesser afinity in the higher fields.
Get verbose disk stats for hdisk0 every 2 sec
iostat -D hdisk0 2
Get extended vmstat info every 2 seconds
while [ 1 ]; do vmstat -vs; sleep 2; clear; done
Get running CPU stats for system
mpstat 1
Get time based summary totals of network usage by process
netpmon to start statistics gathering, trcstop to finish and summarize.
Getting info about the system:
Find the version of AIX that is running
oslevel
Find the ML/TL or service pack version
oslevel -r {or{ oslevel -s
List all attributes of system
getconf -a
Find the type of kernel loaded (use -a to get all options)
getconf KERNEL BITMODE
bootinfo and getconf can return much of the same information, getconf
returns more and has the grepable -a option.
Find the level of rmware on a system
invscout
List all attributes for the kernel \device"
lsattr -El sys0
Print a \dump" of system information
prtconf
Display Error Codes:
214,2C5,2C6,2C7,302,303,305 - Memory errors
152,287,289 - Power supply failure
521 - init process has failed
551,552,554,555,556,557 - Corrupt LVM, rootvg, or JFS log
553 - inittab or /etc/environment corrupt
552,554,556 - Corrupt filesystem superblock
521 through 539 - cfgmgr (and ODM) related errors
532,558 - Out of memory during boot process
518 - Failed to mount /var or /usr
615 - Failed to con g paging device
More information is availible in the \Diagnostic Information for Multiple Bus Systems" manual
Security
groups Lists out the groups that the user is a member of
setgroups Shows user and process groups
chmod abcd (filename) Changes files/directory permissions
Where a is (4 SUID) + (2 SGID) + (1 SVTX)
b is (4 read) + (2 write) + (1 execute) permissions for owner
c is (4 read) + (2 write) + (1 execute) permissions for group
d is (4 read) + (2 write) + (1 execute) permissions for others
-rwxrwxrwx -rwxrwxrwx -rwxrwxrwx
||| ||| |||
- - -
| | |
Owner Group Others
-rwSrwxrwx = SUID -rwxrwSrwx = SGID drwxrwxrwt = SVTX
chown (new owner) (filename) Changes file/directory owners
chgrp (new group) (filename) Changes file/directory groups
chown (new owner).(new group) (filename) Do both !!!
umask Displays umask settings
umask abc Changes users umask settings
where ( 7 - a = new file read permissions)
( 7 - b = new file write permissions)
( 7 - c = new file execute permissions)
eg umask 022 = new file permissions of 755 = read write and execute for owner
read ----- and execute for group
read ----- and execute for other
mrgpwd > file.txt Creates a standard password file in file.txt
passwd Change current user password
pwdadm (username) Change a users password
pwdck -t ALL Verifies the correctness of local authentication
lsgroup ALL Lists all groups on the system
mkgroup (new group) Creates a group
chgroup (attribute) (group) Change a group attribute
rmgroup (group) Removes a group
NFS:
exportfs Lists all exported filesystems
exportfs -a Exports all fs's in /etc/exports file
exportfs -u (filesystem) Un-exports a filesystem
mknfs Configures and starts NFS services
rmnfs Stops and un-configures NFS services
mknfsexp -d /directory Creates an NFS export directory
mknfsmnt Creates an NFS mount directory
mount hostname:/filesystem /mount-point Mount an NFS filesystem
nfso -a Display NFS Options
nfso -o option=value Set an NFS Option
nfso -o nfs_use_reserved_port=1
TAR:
tar -cvf (filename or device) ("files or directories to archive")
eg tar -cvf /dev/rmt0 "/usr/*"
tar -tvf (filename or device) Lists archive
tar -xvf (filename or device) Restore all
tar -xvf (filename or device) ("files or directories to restore")
use -p option for restoring with orginal permissions
eg tar -xvf /dev/rmt0 "tcpip" Restore directory and contents
tar -xvf /dev/rmt0 "tcpip/resolve.conf" Restore a named file
Tape Drive
rmt0.x where x = A + B + C
A = density 0 = high 4 = low
B = retension 0 = no 2 = yes
C = rewind 0 = no 1 = yes
tctl -f (tape device) fsf (No) Skips forward (No) tape markers
tctl -f (tape device) bsf (No) Skips back (No) tape markers
tctl -f (tape device) rewind Rewind the tape
tctl -f (tape device) offline Eject the tape
tctl -f (tape device) status Show status of tape drive
chdev -l rmt0 -a block_size=512 changes block size to 512 bytes
(4mm = 1024, 8mm = variable but
1024 recommended)
bootinfo -e answer of 1 = machine can boot from a tape drive
answer of 0 = machine CANNOT boot from tape drive
diag -c -d (tape device) Hardware reset a tape drive.
tapechk (No of files) Checks Number of files on tape.
< /dev/rmt0 Rewinds the tape !!!
Boot Logical Volume (BLV):
bootlist -m (normal or service) -o displays bootlist
bootlist -m (normal or service) (list of devices) change bootlist
bootinfo -b Identifies the bootable disk
bootinfo -t Specifies type of boot
bosboot -a -d (/dev/pv) Creates a complete boot image on a physical volume.
mkboot -c -d (/dev/pv) Zero's out the boot records on the physical volume.
savebase -d (/dev/pv) Saves customised ODM info onto the boot device.
Outputs necessary to be taken before any activity/reboot
Necessary outputs for any system :
lsvg > lsvg.out
lsvg -o > lsvg-o.out
lspv > lspv.out
df -k > dfk.out
lsdev -C > lsdev.out
lssrc -a|grep active > lssrc.out
lslpp -L > lslpp.out
cat /etc/inittab > inittab.out
ifconfig -a > ifconfig.a.out
netstat -rn > netstatrn.out
powermt display > poweradapters.out
powermt display dev=all > powerhdisks.out
prtconf > prtconf.out
lsfs -q > lsfsq.out
lscfg -vp > lscfg.out
odmget Config_Rules > odmconfigrules.out
odmget CuAt > odmCuAt.out
odmget CuDep > odmCuDep.out
odmget CuDv > odmCuDv.out
odmget CuDvDr > odmCuDvDr.out
odmget PdAt > odmPdAt.out
odmget PdDv > odmPdDDv.out
ps -ef | grep -i pmon > oracle.out
ps -ef > ps.out
ps -ef | wc -l > pswordct.out
ps -ef | grep -i smb > samba.out
who > who.out
last > last.out
If the system has Cluster then:
/usr/es/sbin/cluster/utilities/cldump > cldump.out
/usr/es/sbin/cluster/utilities/cltopinfo > cltopinfo.out
/usr/es/sbin/cluster/utilities/clshowres > clshowres.out
/usr/es/sbin/cluster/utilities/clfindres > clfindres.out
/usr/es/sbin/cluster/utilities/cllscf > cllscf.out
/usr/es/sbin/cluster/utilities/cllsif > cllsif.out
High Availability for AIX
Why HA at All?
While this question may seem counterintuitive, it’s not as cut and dried as it may appear. Oftentimes, the complexities of configuring a highly available environment aren’t worth the expense or the effort. How do we determine this? First and foremost it’s about the Service Level Agreement (SLA) you have with your customers. If you don’t have an SLA, odds are you don’t even need high availability.
An SLA is an agreement between the business and IT that describes the availability required by the application. Some applications, such as the software that powers ATM for banks, can’t afford any downtime. In this scenario, high availability might not be enough—the applications may need a fault-tolerant type of system. Fault-tolerant systems are configured in such a way as to prevent downtime altogether. This usually involves the procurement and configuration of redundant clustered systems. High availability isn’t fault tolerance—it usually involves some kind of downtime, usually measured in minutes, while the failover systems kick into high gear.
The next step is to determine whether you need high availability. These types of discussions are usually held in the design phase of a new application or system deployment. If IT does its homework, it can discuss acceptable levels of downtime and answer several key questions. Can the system be down at all? What is the business/dollars impact of downtime? Downtime can be either schedule or unscheduled. If you can’t take a system down, how are you going to apply patches, upgrade technology levels or apply service packs? At the same time, how are you going to recycle databases, upgrade databases or apply application level patches? When you have a highly available system, you can simply failover to the backup node (during a mutually agreed upon window), do maintenance work and then failover the other way when it’s time to patch up that system.
The net of it all is that the decision whether or not to configure systems for high availability should never be strictly a technical decision. Management needs to sign off on the decision and the business also needs to be ready to pick up the tab for the expense of implementing this type of system. This expense is measured not only in the price of the software, but also in deploying the solution and in educating staff how to maintain it.
IBM’s HACMP
So what’s available for Power Systems customers? Let’s start with IBM’s flagship product HACMP—now called IBM Power HA Cluster Manager (HACMP). HACMP has been around in some form for the better part of two decades now—I myself have used it in varying capacities for almost a decade. It has definitely come a long way. In fact—at this stage it’s now available for the AIX OS and Linux on the Power Systems platform—starting with HACMP 5.4. While there are other clustering solutions available for Linux, HACMP for Linux uses the same interface and configurations as HACMP for AIX, providing a common multi-platform solution that protects your investment as you grow your cluster environments.
IBM also offers an extended distance version, which is commonly referred to as the Disaster Recovery or Business Continuity version of the product. This extends HACMP’s capabilities by replicating critical data—allowing for failover to a remote location. The product is called HACMP/XD.
What’s New with HACMP?
During the days of yore, HACMP was extremely difficult to configure and manage. Through the years it’s gotten much easier to manage. Part of the reason for this is the HACMP Smart Assist programs, which are available for enterprise applications such as DB2, Oracle and WebSphere. These use application-specific knowledge to extend HACMP’s standard auto-discovery features while providing the necessary application monitors and start/stop scripts to streamline configuration of the cluster.
In a sense, HACMP 5.4.1 is a fixpack for HACMP 5.4.0. However there are many enhancements to this product, which align itself to some of the new enhancements in AIX 6 and the POWER6 architecture. Enhancements include:
* Enhanced usability for WebSMIT
* Support for AIX 6.1 workload partitions (WPARs)
* NFS V4 Support (requires AIX 5.3 TL 7 or AIX 6.1)
* New RPV Status monitor
* Support for PPRC consistency groups
IBM’s HACMP solution is mature, rock solid and has the advantage of being aligned by the hip with AIX and the Power Systems platform. With HACMP, one thing you’ll never have to worry about when calling IBM support is someone trying to point the finger of blame to a third-party product.
It should also be noted that there are some exciting third party tools that also offer high availability in the AIX arena, specifically Vision Solutions’ EchoCluster and EchoStream, and Veritas Cluster Server.
EchoCluster/EchoStream:
Vision Solutions systems offer two products: EchoCluster for AIX and EchoStream for AIX. Vision’s high availability solution combines both of these products, so it provides continuous protection which allows one to both prevent downtime, while also recovering data from a single point in time. EchoStream offers Continuous Data Protection, which provides the point-in-time recovery. EchoCluster provides the failover capabilities—in many ways, it’s similar to IBM’s HACMP, though on a smaller scale. It allows for both automated failover and scheduled failover, even at the application level, without disturbing other applications. This is very helpful when one has multiple applications on a single LPAR and one needs to either patch or upgrade their OS to support an application. In this scenario, you could failover applications that have a more stringent SLA, so that you could patch your servers and still run your applications. I’ve seen the GUI and in many ways this is the most simplest of all HA solutions I’ve seen which work with AIX. It’s the simplicity that can eliminate the special training required to run a complex system like HACMP. This solution isn’t for everyone, and it’s marketed for businesses that don’t have complicated clusters. If you have a multi-clustered environment with lots of complexities, you probably should stay with HACMP or evaluate Veritas.
Veritas Cluster Server
Because of its storied history with Sun and Solaris (Sun used to own Veritas)—most people aren’t even aware that Veritas plays in the AIX world. While it doesn’t have the AIX maturity of a product like HACMP, it has had a product that’s worked with AIX for more than five years: Veritas Cluster Server, or VCS. While a competitor of HACMP for the high availability market on the AIX OS, this is mostly a niche product for companies that have already standardized on Veritas (usually those with large Solaris server farms)—and aren’t prepared to make the investment to learn or buy new technology. Owned by Symantec, it’s also the most expensive of the three choices discussed here. One of the advantages to this product is that in speaking with administrators that have worked with both Veritas and HACMP, the consensus is that it’s much easier to build out and maintain a cluster with Veritas than with HACMP. Though HACMP has gotten much more admin-friendly in recent years, in many ways this product is more intuitive.
Evaluate Your Options
Competition is always a good thing, especially when you have these kinds of choices. The safest of the three choices presented here is always going to be HACMP because of its maturity and tight integration with the AIX OS and the Power Systems platform. Without a doubt, Vision’s EchoCluster and Veritas Cluster Server also have strong systems and a client base which proves the worth of their products. While not as well known as HACMP or Veritas, Vision is starting to exert some real muscle as a viable alternative to more complex solutions in the market space. Veritas is certainly a viable solution for those that have large Solaris server farms and/or strong Veritas administrators. When evaluating HA technology—I would evaluate all three before making any choices.
What is HACMP?
Before we explain what is HACMP, we have to define the concept of high availability.
High availability
High availability is one of the components that contributes to providing continuous service for the application
clients, by masking or eliminating both planned and unplanned systems and
application downtime. This is achieved through the elimination of hardware and
software single points of failure (SPOFs).
High Availability Solutions should eliminate single points of failure (SPOF)
through appropriate design, planning, selection of hardware, configuration of
software, and carefully controlled change management discipline.
Downtime
The downtime is the time frame when an application is not available to serve its
clients. We can classify the downtime as:
Planned:
– Hardware upgrades
– Repairs
– Software updates/upgrades
– Backups (offline backups)
– Testing (periodic testing is required for cluster validation.)
– Development
Unplanned:
– Administrator errors
– Application failures
– Hardware failures
– Environmental disasters
Short description for HACMP:
The IBM high availability solution for AIX, High Availability Cluster Multi
Processing, is based on the well-proven IBM clustering technology, and consists
of two components:
High availability: The process of ensuring an application is available for use
through the use of duplicated and/or shared resources.
Cluster multi-processing: Multiple applications running on the same nodes
with shared or concurrent access to the data.
A high availability solution based on HACMP provides automated failure
detection, diagnosis, application recovery, and node reintegration. With an
appropriate application, HACMP can also provide concurrent access to the data
for parallel processing applications, thus offering excellent horizontal scalability.
A typical HACMP environment is shown in Figure 1-1.

Frequently Asking questions in HACMP
a. What characters should a hostname contain for HACMP configuration?
The hostname cannot have following characters: -, _, * or other special characters.
b. Can Service IP and Boot IP be in same subnet?
No. The service IP address and Boot IP address cannot be in same subnet. This is the basic requirement for HACMP cluster configuration. The verification process does not allow the IP addresses to be in same subnet and cluster will not start.
c. Can multiple Service IP addresses be configured on single Ethernet cards?
Yes. Using SMIT menu, it can be configured to have multiple Service IP addresses running on single Ethernet card. It only requires selecting same network name for specific Service IP addresses in SMIT menu.
d. What happens when a NIC having Service IP goes down?
When a NIC card running the Service IP address goes down, the HACMP detects the failure and fails over the service IP address to available standby NIC on same node or to another node in the cluster.
e. Can Multiple Oracle Database instances be configured on single node of HACMP cluster?
Yes. Multiple Database instances can be configured on single node of HACMP cluster. For this one needs to have separate Service IP addresses over which the listeners for every Oracle Database will run. Hence one can have separate Resource groups which will own each Oracle instance. This configuration will be useful if there is a failure of single Oracle Database instance on one node to be failed over to another node without disturbing other running Oracle instances.
f. Can HACMP be configured in Active - Passive configuration?
Yes. For Active - In Passive cluster configuration, do not configure any Service IP on the passive node. Also for all the resource groups on the Active node please specify the passive node as the next node in the priority to take over in the event of failure of active node.
g. Can file system mounted over NFS protocol be used for Disk Heartbeat?
No. The Volume mounted over NFS protocol is a file system for AIX, and since disk device is required for Enhanced concurrent capable volume group for disk heartbeat the NFS file system cannot be used for configuring the disk heartbeat. One needs to provide disk device to AIX hosts over FCP or iSCSI protocol.
h. Which are the HACMP log files available for troubleshooting?
Following are log files which can be used for troubleshooting:
1. /var/hacmp/clverify/current//* contains logs from current execution of cluster verification.
2. /var/hacmp/clverify/pass//* contains logs from the last time verification passed.
3. /var/hacmp/clverify/fail//* contains logs from the last time verification failed.
4. /tmp/hacmp.out file records the output generated by the event scripts of HACMP as they execute.
5. /tmp/clstmgr.debug file contains time-stamped messages generated by HACMP clstrmgrES activity.
6. /tmp/cspoc.log file contains messages generated by HACMP C-SPOC commands.
7. /usr/es/adm/cluster.log file is the main HACMP log file. HACMP error messages and messages about HACMP related events are appended to this log.
8. /var/adm/clavan.log file keeps track of when each application that is managed by HACMP is started or stopped and when the node stops on which an application is running.
9. /var/hacmp/clcomd/clcomd.log file contains messages generated by HACMP cluster communication daemon.
10. /var/ha/log/grpsvcs. file tracks the execution of internal activities of the grpsvcs daemon.
11. /var/ha/log/topsvcs. file tracks the execution of internal activities of the topsvcs daemon.
12. /var/ha/log/grpglsm file tracks the execution of internal activities of grpglsm daemon.
HACMP configuration
CONFIGURING NETWORK INTERFACE ADAPTERS
In our example, we have two NICs, one used as cluster interconnects and other as bootable adapter. The service IP address will be activated on the bootable adapter after cluster services are started on the nodes. Following IP addresses are used in the setup:
NODE1: hostname – btcppesrv5
Boot IP address - 10.73.70.155 btcppesrv5
Netmask - 255.255.254.0
Interconnect IP address - 192.168.73.100 btcppesrv5i
Netmask - 255.255.255.0
Service IP address - 10.73.68.222 btcppesrv5sv
Netmask - 255.255.254.0
NODE2: hostname – btcppesrv6
Boot IP address - 10.73.70.156 btcppesrv6
Netmask - 255.255.254.0
Interconnect IP address - 192.168.73.101 btcppesrv6i
Netmask - 255.255.255.0
Service IP address - 10.73.68.223 btcppesrv6sv
Netmask - 255.255.254.0
EDITING CONFIGURATION FILES FOR HACMP
1. /usr/sbin/cluster/netmon.cf – All the IP addresses present in the network need to be entered in this file. Refer to Appendix for sample file.
2. /usr/sbin/cluster/etc/clhosts – All the IP addresses present in the network need to be entered in this file. Refer to Appendix for sample file.
3. /usr/sbin/cluster/etc/rhosts - All the IP addresses present in the network need to be entered in this file. Refer to Appendix for sample file.
4. /.rhosts – All the IP addresses present in the network with username (i.e. root) need to be entered in this file. Refer to Appendix for sample file.
5. /etc/hosts – All the IP addresses with their IP labels present in network need to be entered in this file. Refer to Appendix for sample file.
Note: All the above mentioned files need to be configured on both the nodes of cluster.
CREATING CLUSTER USING SMIT
This is a sample HACMP configuration that might require customization for your environment. This section demonstrates how to configure two AIX nodes, btcppesrv5 and btcppesrv6, into a HACMP cluster.
1. Configure two AIX nodes to allow the user root to use the rcp and remsh commands between themselves without having to specify a password.
2. Log in as user root on AIX node btcppesrv5.
3. Enter the following command to create an HACMP cluster.
# smit hacmp
Perform the following steps. These instructions assume that you are using the graphical user interface to SMIT (that is, smit –M). If you are using the ASCII interface to SMIT (that is, smit –C), modify these instructions accordingly.
a) Click Initialization and Standard Configuration.
b) Click Configure an HACMP Cluster and Nodes.
c) In the Cluster Name field, enter netapp.
d) In the New Nodes (via selected communication paths) field, enter btcppesrv5 and btcppesrv6.
e) Click OK.
f) Click Done.
g) Click Cancel.
h) Select the Exit > Exit SMIT Menu option.
4. Enter the following command to configure the heartbeat networks as private networks.
# smit hacmp
Perform the following steps.
a) Click Extended Configuration.
b) Click Extended Topology Configuration.
c) Click Configure HACMP Networks.
d) Click Change/Show a Network in the HACMP cluster.
e) Select net_ether_01 (192.168.73.0/24).
f) In the Network Attribute field, select private.
g) Click OK.
h) Click Done.
i) Click Cancel.
j) Select the Exit > Exit SMIT Menu option.
5. Enter the following command to configure Service IP Labels/Addresses.
# smit hacmp
Perform the following steps.
a) Click Initialization and Standard Configuration.
b) Click Configure Resources to Make Highly Available.
c) Click Configure Service IP Labels / Addresses.
d) Click Add a Service IP Label / Address.
e) In the IP Label / Address field, enter btcppsrv5sv.
f) In the Network Name field, select net_ether_02 (10.73.70.0/23). The Service IP label will be activated on network interface 10.73.70.0/23 after cluster service starts.
g) Click OK.
h) Click Done.
i) Click Cancel.
j) Similarly follow steps d) to h) for adding second service IP label btcppsrv6sv.
k) Select the Exit > Exit SMIT Menu option.
6. Enter the following command to create Empty Resource Groups with Node priorities.
# smit hacmp
Perform the following steps.
a) Click Initialization and Standard Configuration.
b) Click Configure HACMP Resource Groups.
c) Click Add a Resource Group.
d) In the Resource Group Name field, enter RG1.
e) In the Participating Nodes (Default Node Priority) field, enter btcppesrv5 and btcppesrv6. The Resource Group RG1 will be online on btcppsrv5 first when cluster service starts; in the event of failure RG1 will be taken over by btcppesrv6 as the node priority for RG1 is assigned to btcppesrv5 first.
f) Click OK.
g) Click Done.
h) Click Cancel.
i) Similarly follow steps d) to h) for adding second Resource group RG2 with node priority first assigned to btcppesrv6.
j) Select the Exit > Exit SMIT Menu option.
7. Enter the following command to make Service IP labels part of Resource Groups.
# smit hacmp
Perform the following steps.
a) Click Initialization and Standard Configuration.
b) Click Configure HACMP Resource Groups.
c) Click Change/Show Resources for a Resource Group (standard).
d) Select a resource Group from pick list as RG1.
e) In the Service IP Labels / Addresses field, enter btcppesrv5sv. As btcppesrv5sv service IP label has to be activated on first node btcppesrv5.
f) Click OK.
g) Click Done.
h) Click Cancel.
i) Similarly follow steps c) to h) for adding second Service IP Label btcppesrv6sv in Resource Group RG2. A btcppesrv6sv service IP label has to be activated on second node btcppesrv6.
j) Select the Exit > Exit SMIT Menu option.
VERIFYING AND SYNCHRONIZING CLUSTER USING SMIT
This section demonstrates how to verify and synchronize the nodes in an HACMP cluster. This process of verification and synchronization actually verifies the HACMP configuration done from one node and then synchronizes to other node in the cluster. So whenever there are any changes to be done in the HACMP cluster, they are required to be done from a single node and to be synchronized with other nodes.
1. Log in as user root on AIX node btcppesrv5.
2. Enter following command to verify and synchronize all nodes in HACMP cluster.
# smit hacmp
Perform the following steps.
a) Click Initialization and Standard Configuration.
b) Click Verify and Synchronize HACMP Configuration.
c) Click Done.
d) Select the Exit > Exit SMIT Menu option.
STARTING CLUSTER SERVICES
This section demonstrates how to start an HACMP cluster on both the participating nodes.
1. Log in as user root on AIX node btcppesrv5.
2. Enter following command to start HACMP cluster.
# smit cl_admin
Perform the following steps.
a) Click Manage HACMP services.
b) Click Start Cluster Services.
c) In the Start Now, on System Restart or Both fields, select now.
d) In the Start Cluster Services on these nodes field, enter btcppesrv5 and btcppesrv6. The cluster services can be started on both the nodes simultaneously.
e) In the Startup Cluster Information Daemon field, select true.
f) Click OK.
g) Click Done.
h) Click Cancel.
i) Select the Exit > Exit SMIT Menu option.
STOPPING CLUSTER SERVICES
This section demonstrates how to stop an HACMP cluster on both the participating nodes.
1. Log in as user root on AIX node btcppesrv5.
2. Enter following command to stop HACMP cluster.
# smit cl_admin
Perform the following steps.
a) Click Manage HACMP services.
b) Click Stop Cluster Services.
c) In the Stop Now, on System Restart or Both fields, select now.
d) In the Stop Cluster Services on these nodes field, enter btcppesrv5 and btcppesrv6. The cluster services can be stopped on both the nodes simultaneously.
e) Click OK.
f) In the Are You Sure? Dialog box, click OK.
g) Click Done.
h) Click Cancel.
i) Select the Exit > Exit SMIT Menu option.
CONFIGURING DISK HEARTBEAT
For configuring Disk Heartbeating, it is required to create the Enhanced Concurrent Capable Volume group on both the AIX nodes.To be able to use HACMP C-SPC successfully, it is required that some basic IP based topology already exists, and that the storage devices have their PVIDs on both systems’ ODMs. This can be verified by running lspv command on each AIX node. If a PVID does not exist on any AIX node, it is necessary to run
chdev –l -a pv=yes command on each AIX node.
btcppesrv5#> chdev –l hdisk3 –a pv=yes
btcppesrv6#> chdev –l hdisk3 –a pv=yes
This will allow C-SPOC to match up the device(s) as known shared storage devices.
This demonstrates how to create Enhanced Concurrent Volume Group:
1. Log in as user root on AIX node btcppesrv5.
2. Enter following command to create Enhanced concurrent VG.
# smit vg
Perform the following steps.
a) Click Add Volume Group.
b) Click Add an Original Group.
c) In the Volume group name field, enter heartbeat.
d) In the Physical Volume Names field, enter hdisk3.
e) In the Volume Group Major number field, enter 59. This number is the number available for a particular AIX node; it can be found out from the available list in the field.
f) In the Create VG concurrent capable field, enter YES.
g) Click OK.
h) Click Done.
i) Click Cancel.
j) Select the Exit > Exit SMIT Menu option.
On btcppesrv5 AIX node check the newly created volume group using command lsvg.
On second AIX node enter importvg –V -y command to import the volume group:
btcppesrv6#> importvg -V 59 -y heartbeat hdisk3
Since the enhanced concurrent volume groups are available for both the AIX nodes, we will use discovery method of HACMP to find the disks available for Heartbeat.
This demonstrates how to configure Disk heartbeat in HACMP:
1. Log in as user root on AIX node btcppesrv5.
2. Enter following command to configure Disk heartbeat.
# smit hacmp
Perform the following steps.
a) Click Extended Configuration.
b) Click Discover HACMP-related information from configured Nodes. This will run automatically and create /usr/es/sbin/cluster/etc/config/clvg_config file that contains the information it has discovered.
c) Click Done.
d) Click Cancel.
e) Click Extended Configuration.
f) Click Extended Topology Configuration.
g) Click Configure HACMP communication Interfaces/Devices.
h) Click Add Communication Interfaces/Devices.
i) Click Add Discovered Communication Interfaces and Devices.
j) Click Communication Devices.
k) Select both the Devices listed in the list.
l) Click Done.
m) Click Cancel.
n) Select the Exit > Exit SMIT Menu option.
It is necessary to add the Volume group into HACMP Resource Group and synchronize the cluster.
Enter the following command to create Empty Resource Groups with different policies than what we created earlier.
# smit hacmp
Perform the following steps.
a) Click Initialization and Standard Configuration.
b) Click Configure HACMP Resource Groups.
c) Click Add a Resource Group.
d) In the Resource Group Name field, enter RG3.
e) In the Participating Nodes (Default Node Priority) field, enter btcppesrv5 and btcppesrv6.
f) In the Startup policy field, enter Online On All Available Nodes.
g) In the Fallover Policy field, enter Bring Offline (On Error Node Only).
h) In the Fallback Policy field, enter never Fallback.
i) Click OK.
j) Click Done.
k) Click Cancel.
l) Click Change/Show Resources for a Resource Group (Standard).
m) Select RG3 from the list.
n) In the Volume Groups field, enter heartbeat. The concurrent capable volume group which was created earlier.
o) Click OK.
p) Click Done.
q) Click Cancel.
r) Select the Exit > Exit SMIT Menu option.
Hacmp Installation
HACMP software installation :
Considering that your cluster is well planned we can see the below steps for HACMP installation
Checking for prerequisites
Once you have finished your planning working sheets, verify that your system meets the requirements that are required by HACMP; many potential errors can be eliminated if you make this extra effort. HACMP V5.1 requires one of the following operating system components:

Install the RSCT (Reliable Scalable Cluster Technology) images before installing HACMP. Ensure that each node has the same version of RSCT.
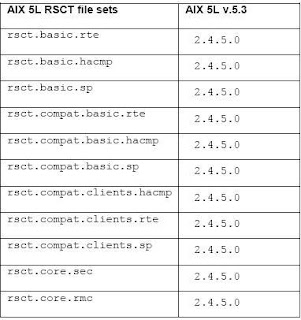
HACMP SOFTWARE INSTALLATION
The HACMP software installation medium contains the HACMP enhanced scalability subsystem images. This provides the services for cluster membership, system management, configuration integrity and control, failover, and recovery. It also includes cluster status and monitoring facilities for programmers and system administrators.
To install the HACMP software on a server node from the installation medium:
1) Insert the CD into the CD-ROM drive and enter: smit install_all SMIT displays the first Install and Update from ALL Available Software panel.
2) Enter the device name of the installation medium or install directory in the INPUT device / directory for software field and press Enter.
3) Enter field values as follows.

4) The fields other than mentioned in above table should be kept as default values only. When one is satisfied with the entries, press Enter.
5) SMIT prompts to confirm the selections.
6) Press Enter again to install.
7) After the installation completes, verify the installation as described in the below section
To complete the installation after the HACMP software is installed:
1) Verify the software installation by using the AIX 5L command lppchk, and check the installed directories for the expected files. The lppchk command verifies that files for an installable software product (file set) match the Software Vital Product Data (SWVPD) database information for file sizes, checksum values, or symbolic links.
2) Run the commands lppchk -v and lppchk -c “cluster.*”
3) If the installation is OK, both commands should return nothing.
4) Reboot each HACMP cluster node.
Considering that your cluster is well planned we can see the below steps for HACMP installation
Checking for prerequisites
Once you have finished your planning working sheets, verify that your system meets the requirements that are required by HACMP; many potential errors can be eliminated if you make this extra effort. HACMP V5.1 requires one of the following operating system components:
- AIX 5L V5.1 ML5 with RSCT V2.2.1.30 or higher.
- AIX 5L V5.2 ML2 with RSCT V2.3.1.0 or higher (recommended 2.3.1.1).
- C-SPOC vpath support requires SDD 1.3.1.3 or higher.

Install the RSCT (Reliable Scalable Cluster Technology) images before installing HACMP. Ensure that each node has the same version of RSCT.

HACMP SOFTWARE INSTALLATION
The HACMP software installation medium contains the HACMP enhanced scalability subsystem images. This provides the services for cluster membership, system management, configuration integrity and control, failover, and recovery. It also includes cluster status and monitoring facilities for programmers and system administrators.
To install the HACMP software on a server node from the installation medium:
1) Insert the CD into the CD-ROM drive and enter: smit install_all SMIT displays the first Install and Update from ALL Available Software panel.
2) Enter the device name of the installation medium or install directory in the INPUT device / directory for software field and press Enter.
3) Enter field values as follows.

4) The fields other than mentioned in above table should be kept as default values only. When one is satisfied with the entries, press Enter.
5) SMIT prompts to confirm the selections.
6) Press Enter again to install.
7) After the installation completes, verify the installation as described in the below section
To complete the installation after the HACMP software is installed:
1) Verify the software installation by using the AIX 5L command lppchk, and check the installed directories for the expected files. The lppchk command verifies that files for an installable software product (file set) match the Software Vital Product Data (SWVPD) database information for file sizes, checksum values, or symbolic links.
2) Run the commands lppchk -v and lppchk -c “cluster.*”
3) If the installation is OK, both commands should return nothing.
4) Reboot each HACMP cluster node.
Subscribe to:
Comments (Atom)